QGIS: Compass with magnetic declination
, 6 min, 1010 words
Tags: gis
Learn to add magnetic declination to all your QGIS maps and charts! Part 1 is here.
If you're an experienced paddler, you'll recognize the NOAA compass with declination anywhere:
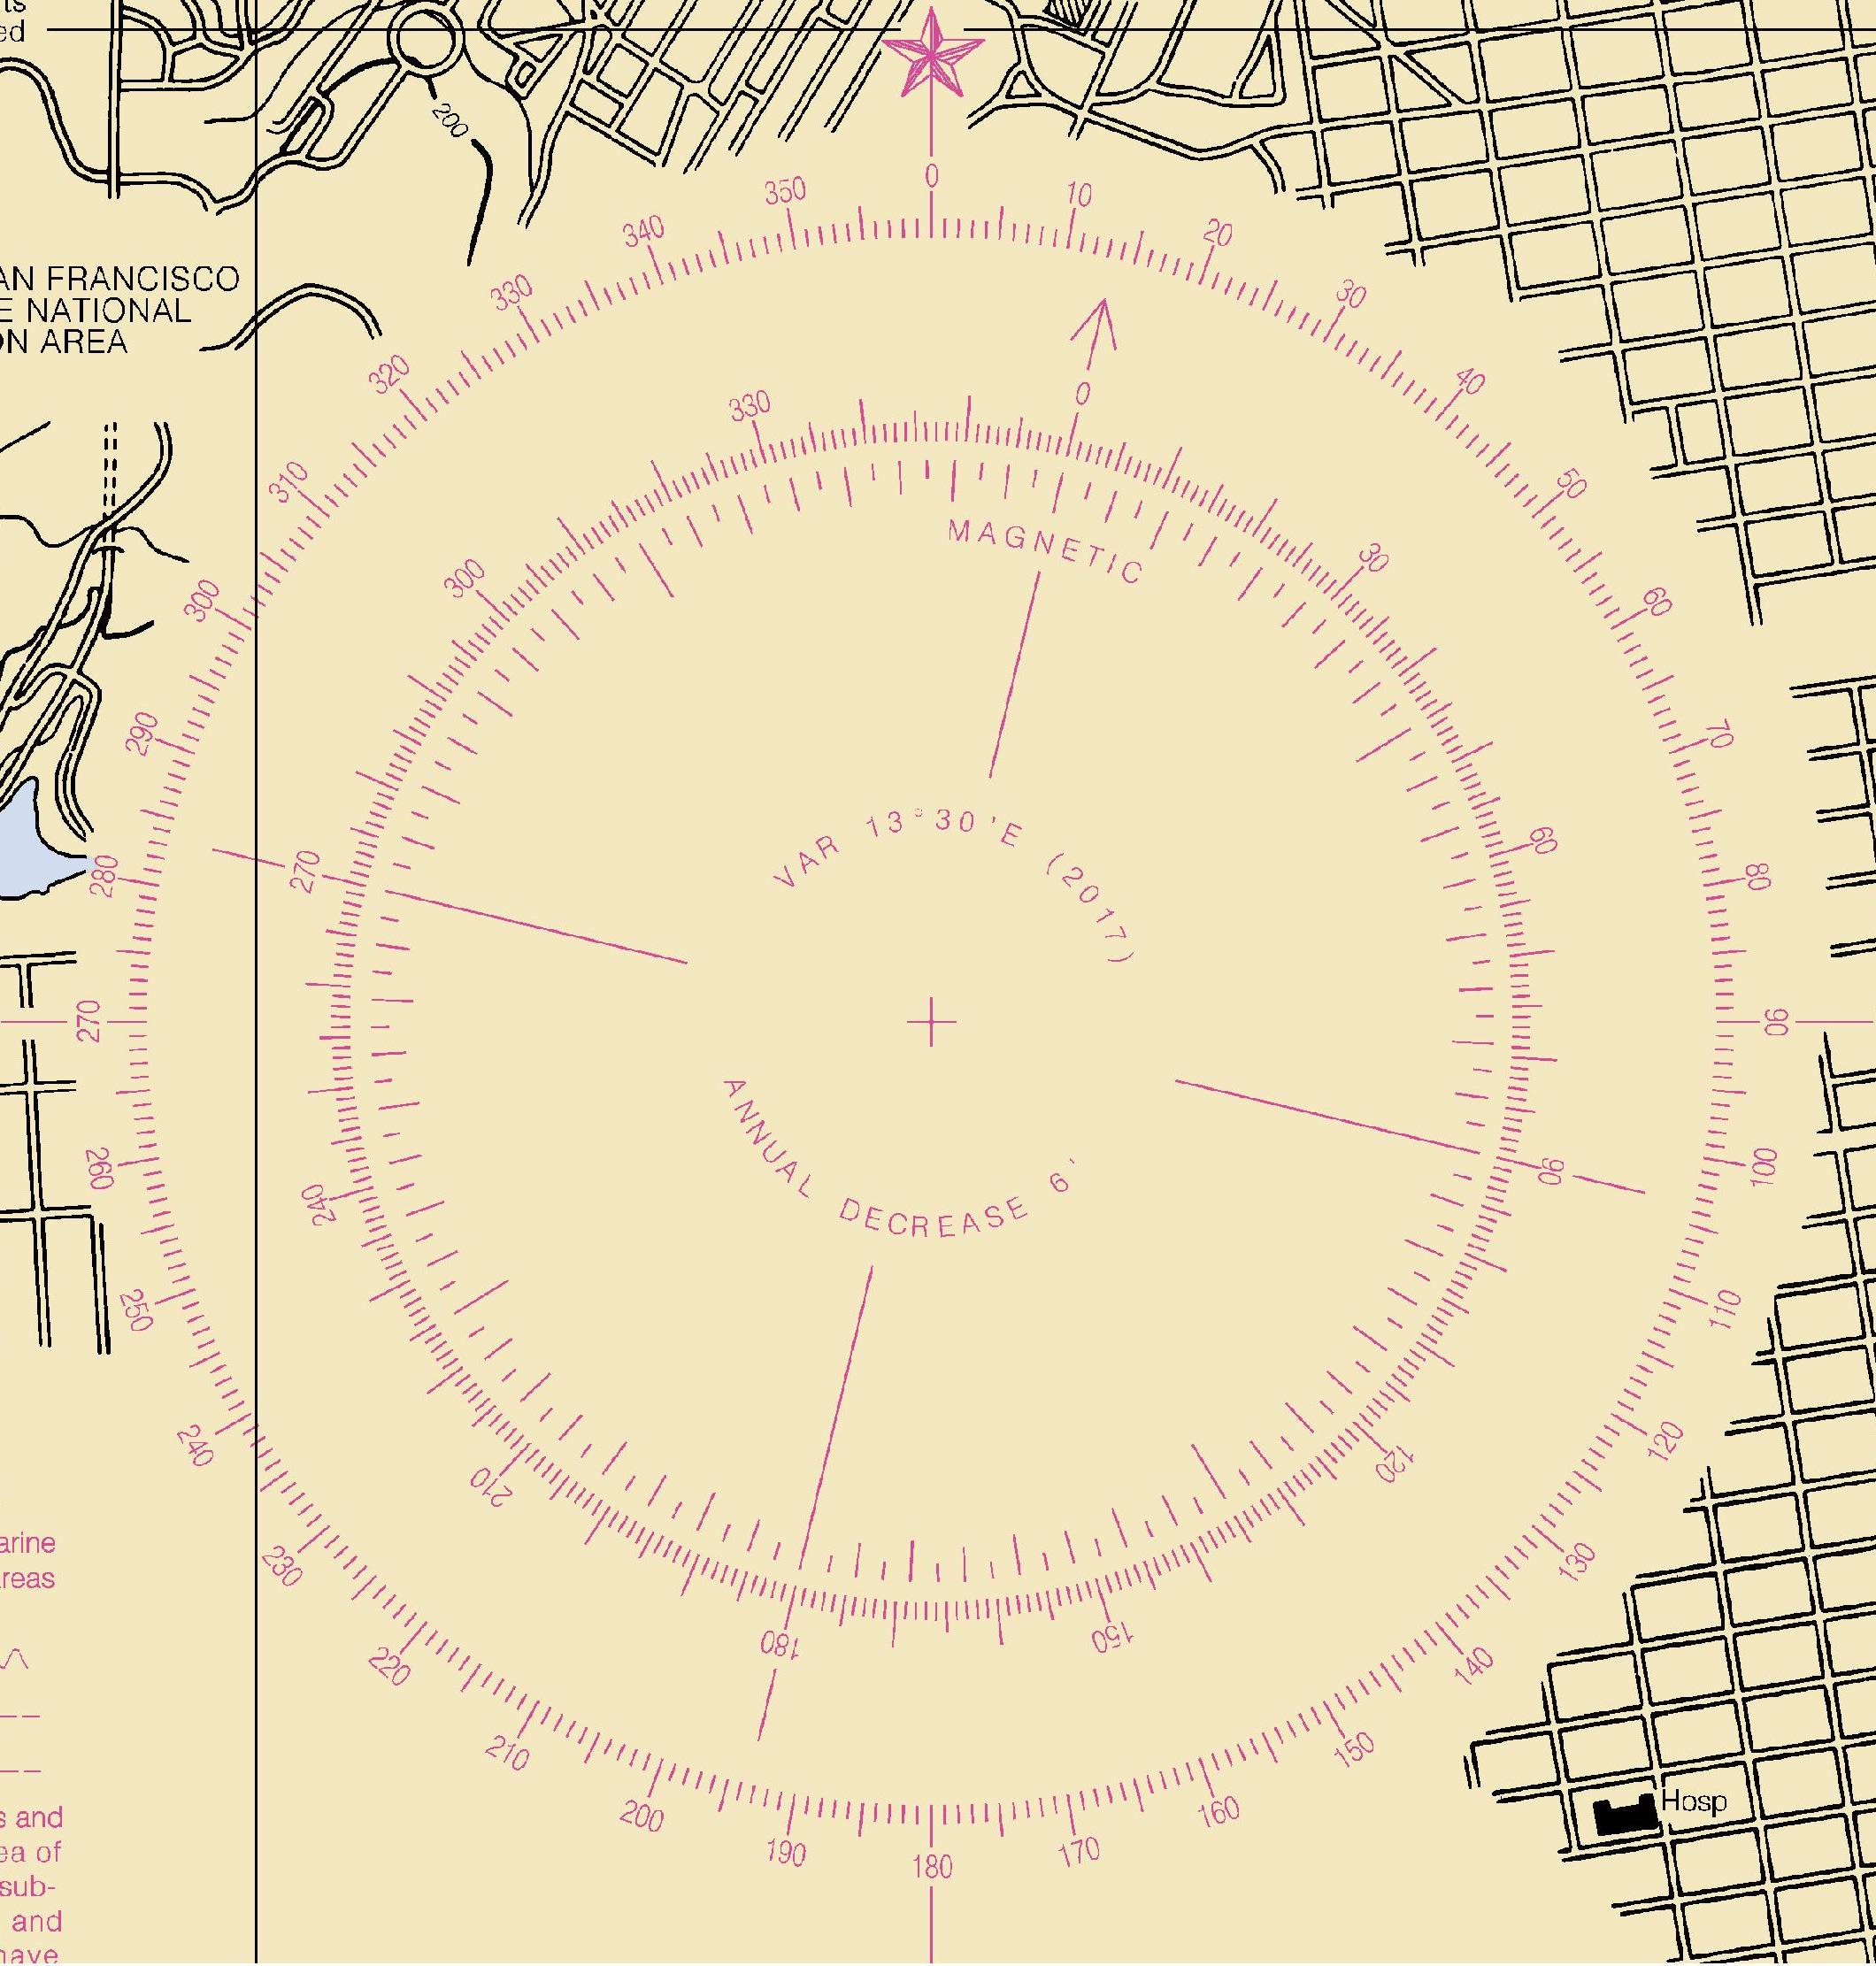
(From NOAA chart 18650, RNC format available on NOAA site)
These are sprinkled all over every chart, because you want one always to hand when you need it.
So when it comes to making your own maps/charts for navigation, if you need a map of a specific area but it doesn't come with a compass built in...what are you to do?
Well, if you're in QGIS, look no further! This is a step-by-step walkthrough of adding a NOAA-style compass to any map you like.
This tutorial expects that you've already Installed the Magnetic Declination plugin. If you're not sure how to do that, check out my post on the topic here.
We're going to follow these steps to make it happen:
- Open the magnetic declination plugin window
- Get to the calculate tab!
- Select the location you want the center of the compass
- Calculate magnetic declination
- Draw the compass on the map
- Save the compass layer if you want to keep it
Open the plugin window
To use the magnetic declination plugin, you have two options. If the green and yellow star is already in your toolbar, you can just click it. Otherwise, you can go to Plugins -> Magnetic Declination -> Magnetic Declination.
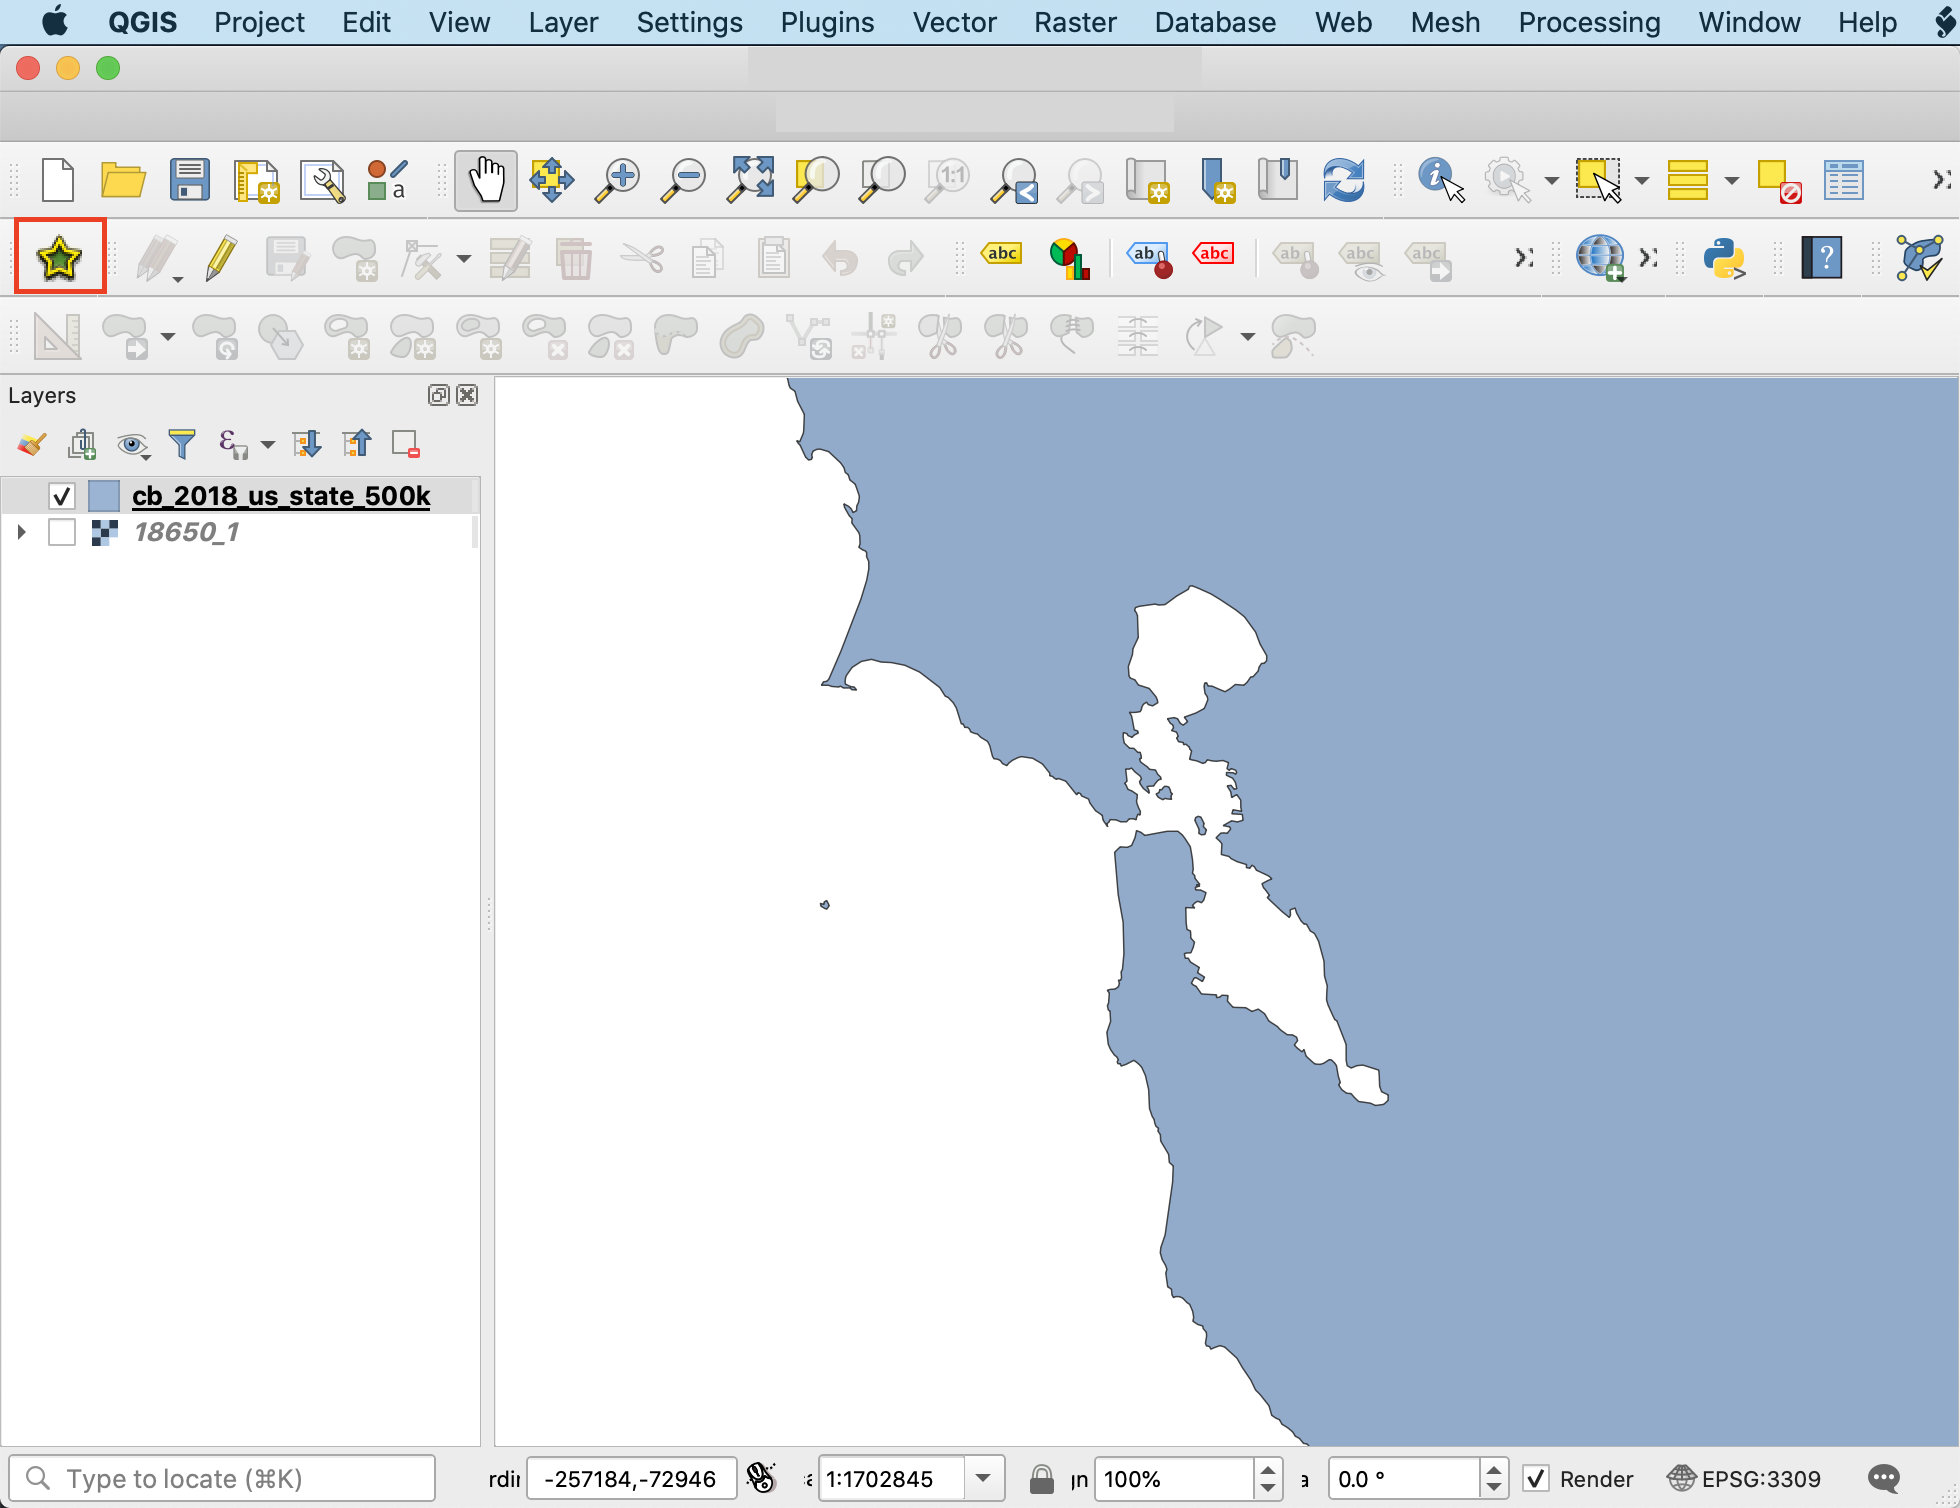
Option 1: Yellow and green star in toolbar
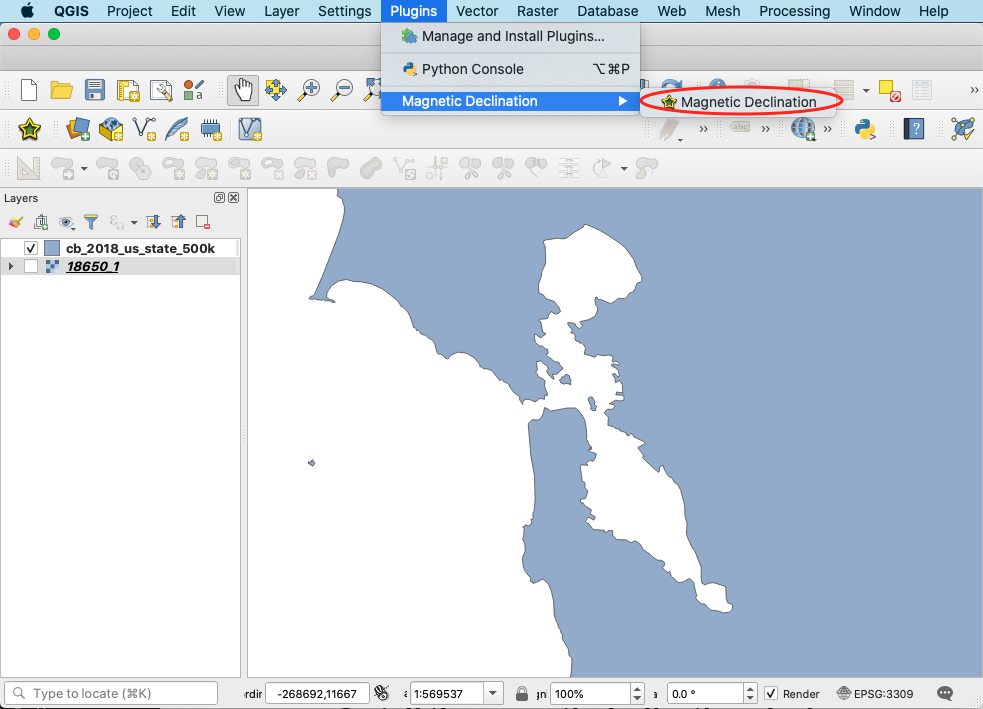
Option 2: Plugins -> Magnetic Declination -> Magnetic Declination
Go to the calculate tab
As of August 2020, there are four tabs in the Magnetic Declination window: Calculate, Options, Help, and About. You want the calculate tab. (You can also change the compass color in Options.)
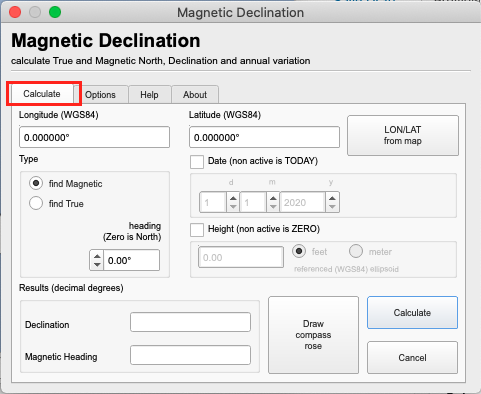
Select where you want the center of the compass
Click the "LON/LAT from map" button.
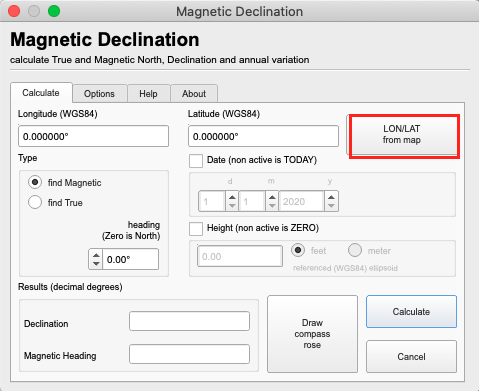
It'll pop back to the original QGIS window, where you should click exactly where you want the center of the compass. Ideally, pick a nice open area without too much distraction.
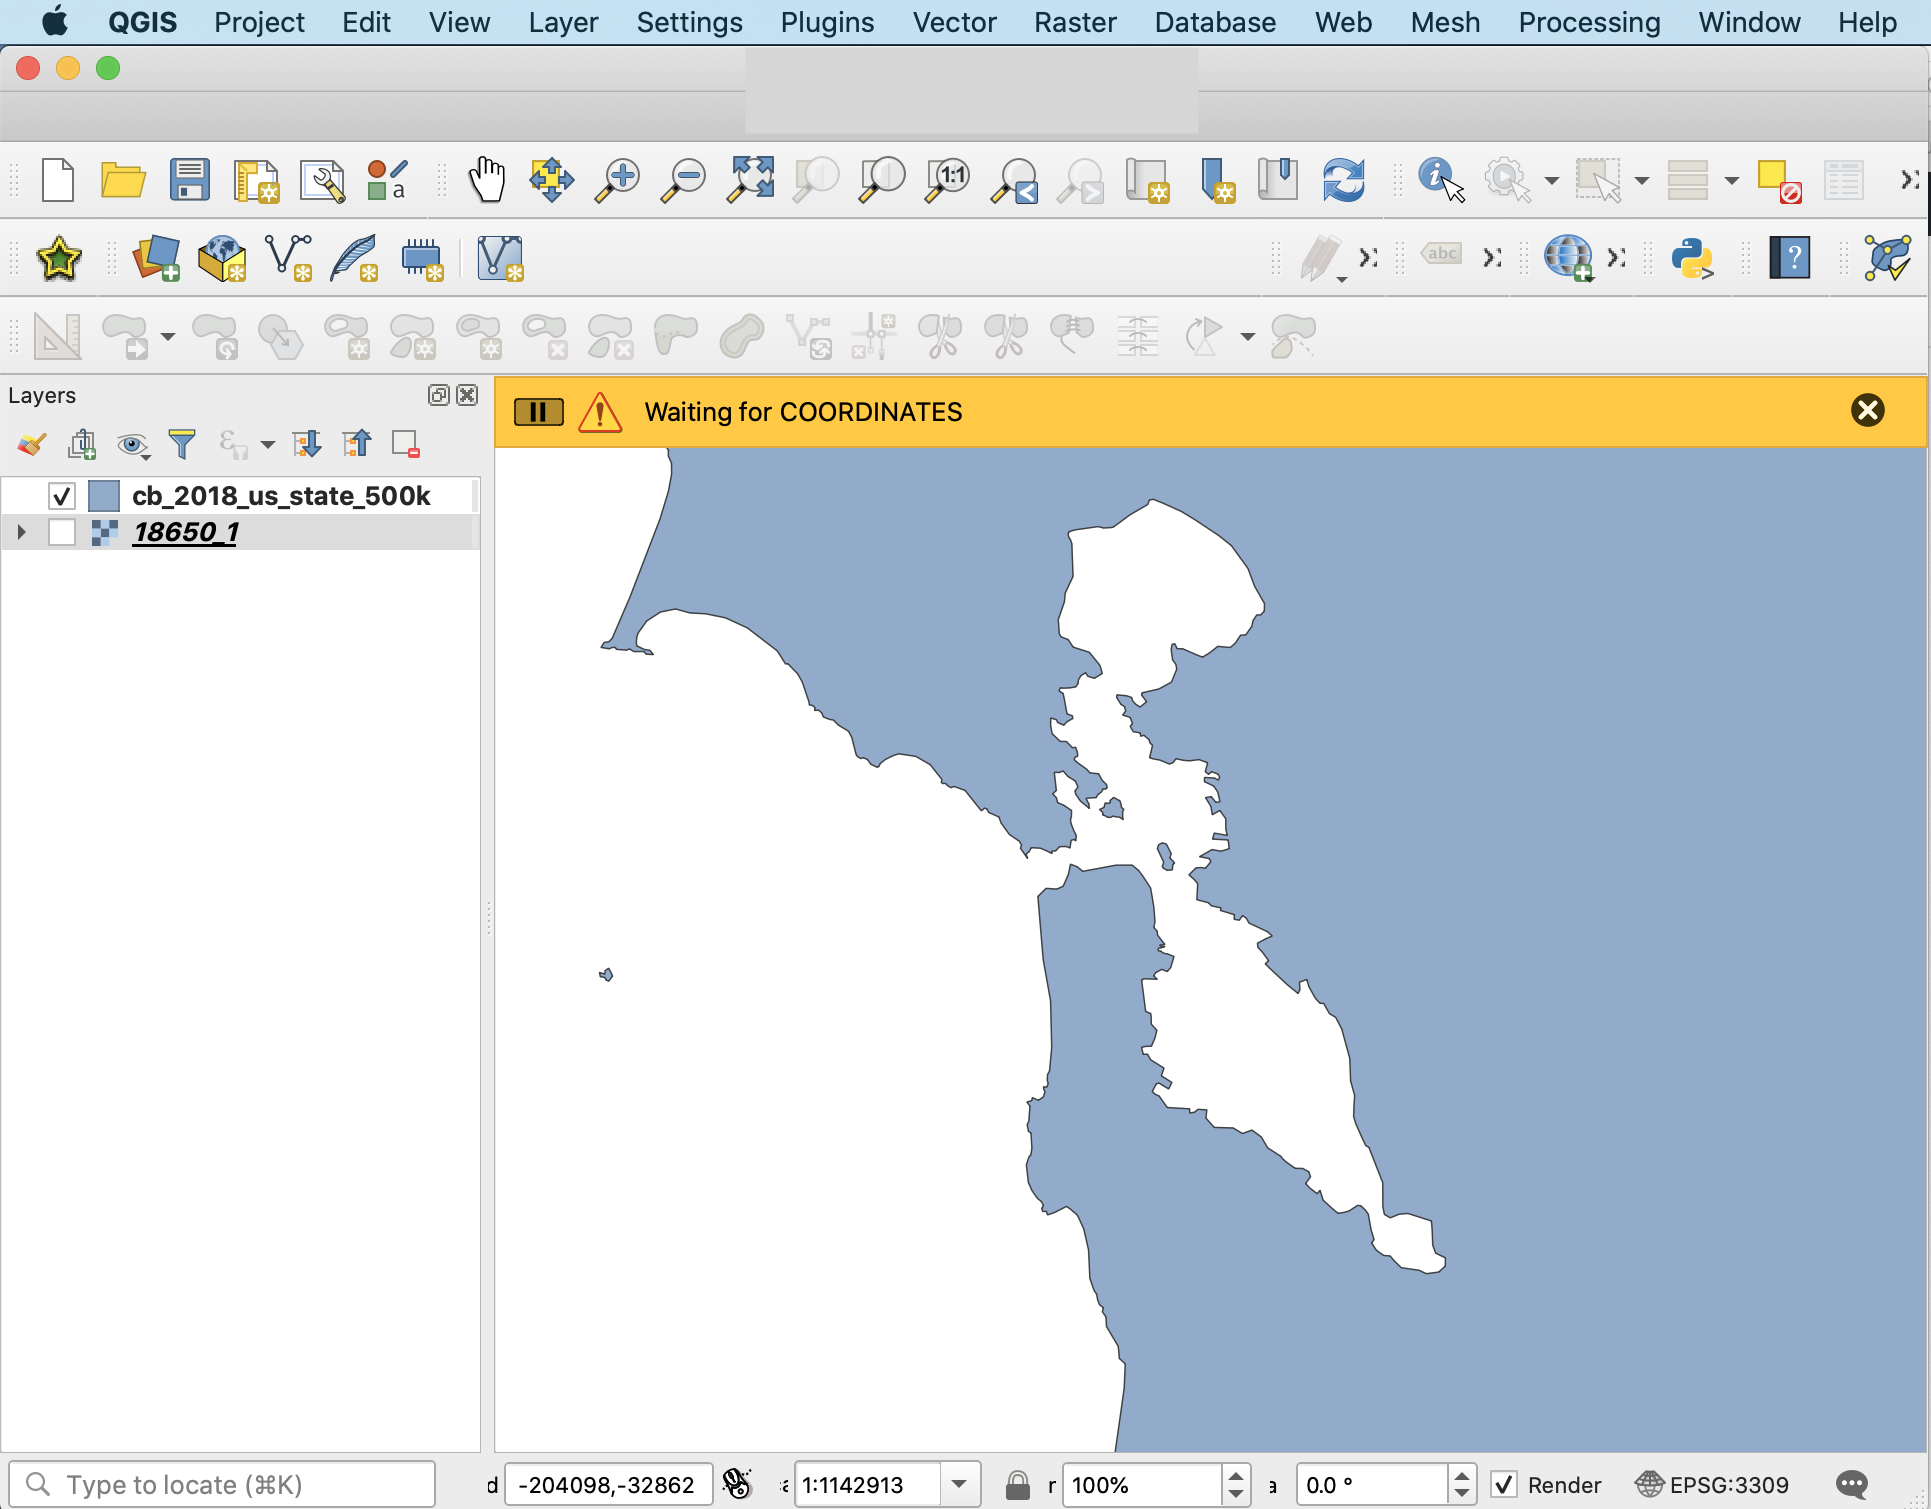
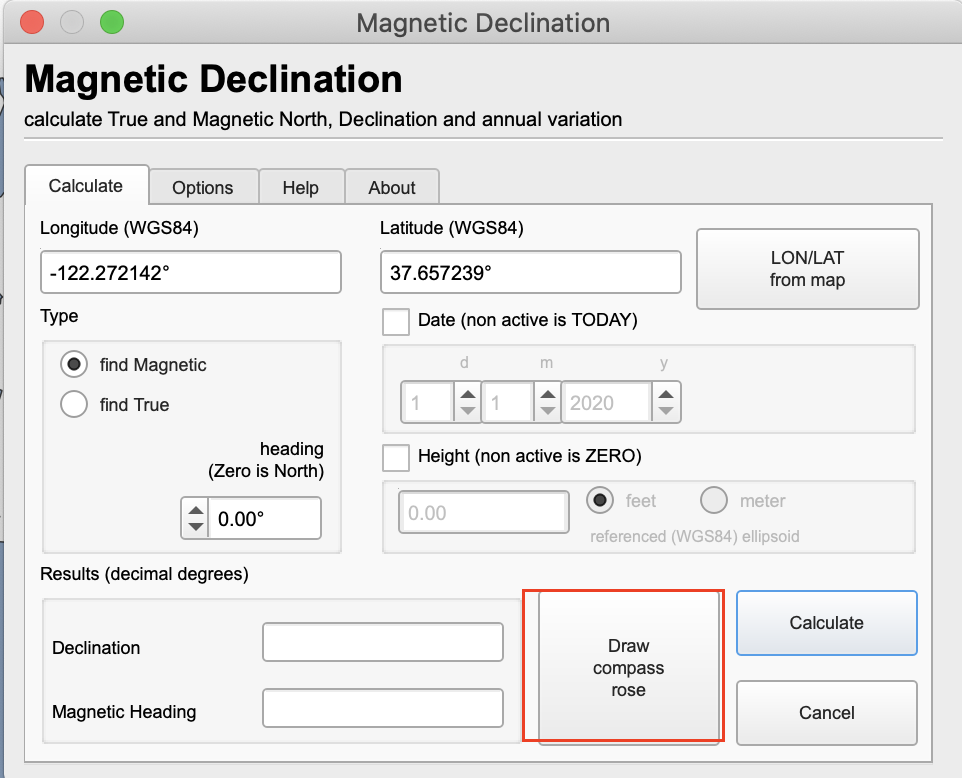
Once you click, it brings you back to the plugin window.
Calculate magnetic declination
Press the calculate button! This is an important step! This is where the plugin does the math to figure out what the magnetic variation is at that location.

Draw the compass
Click on "Draw compass rose."
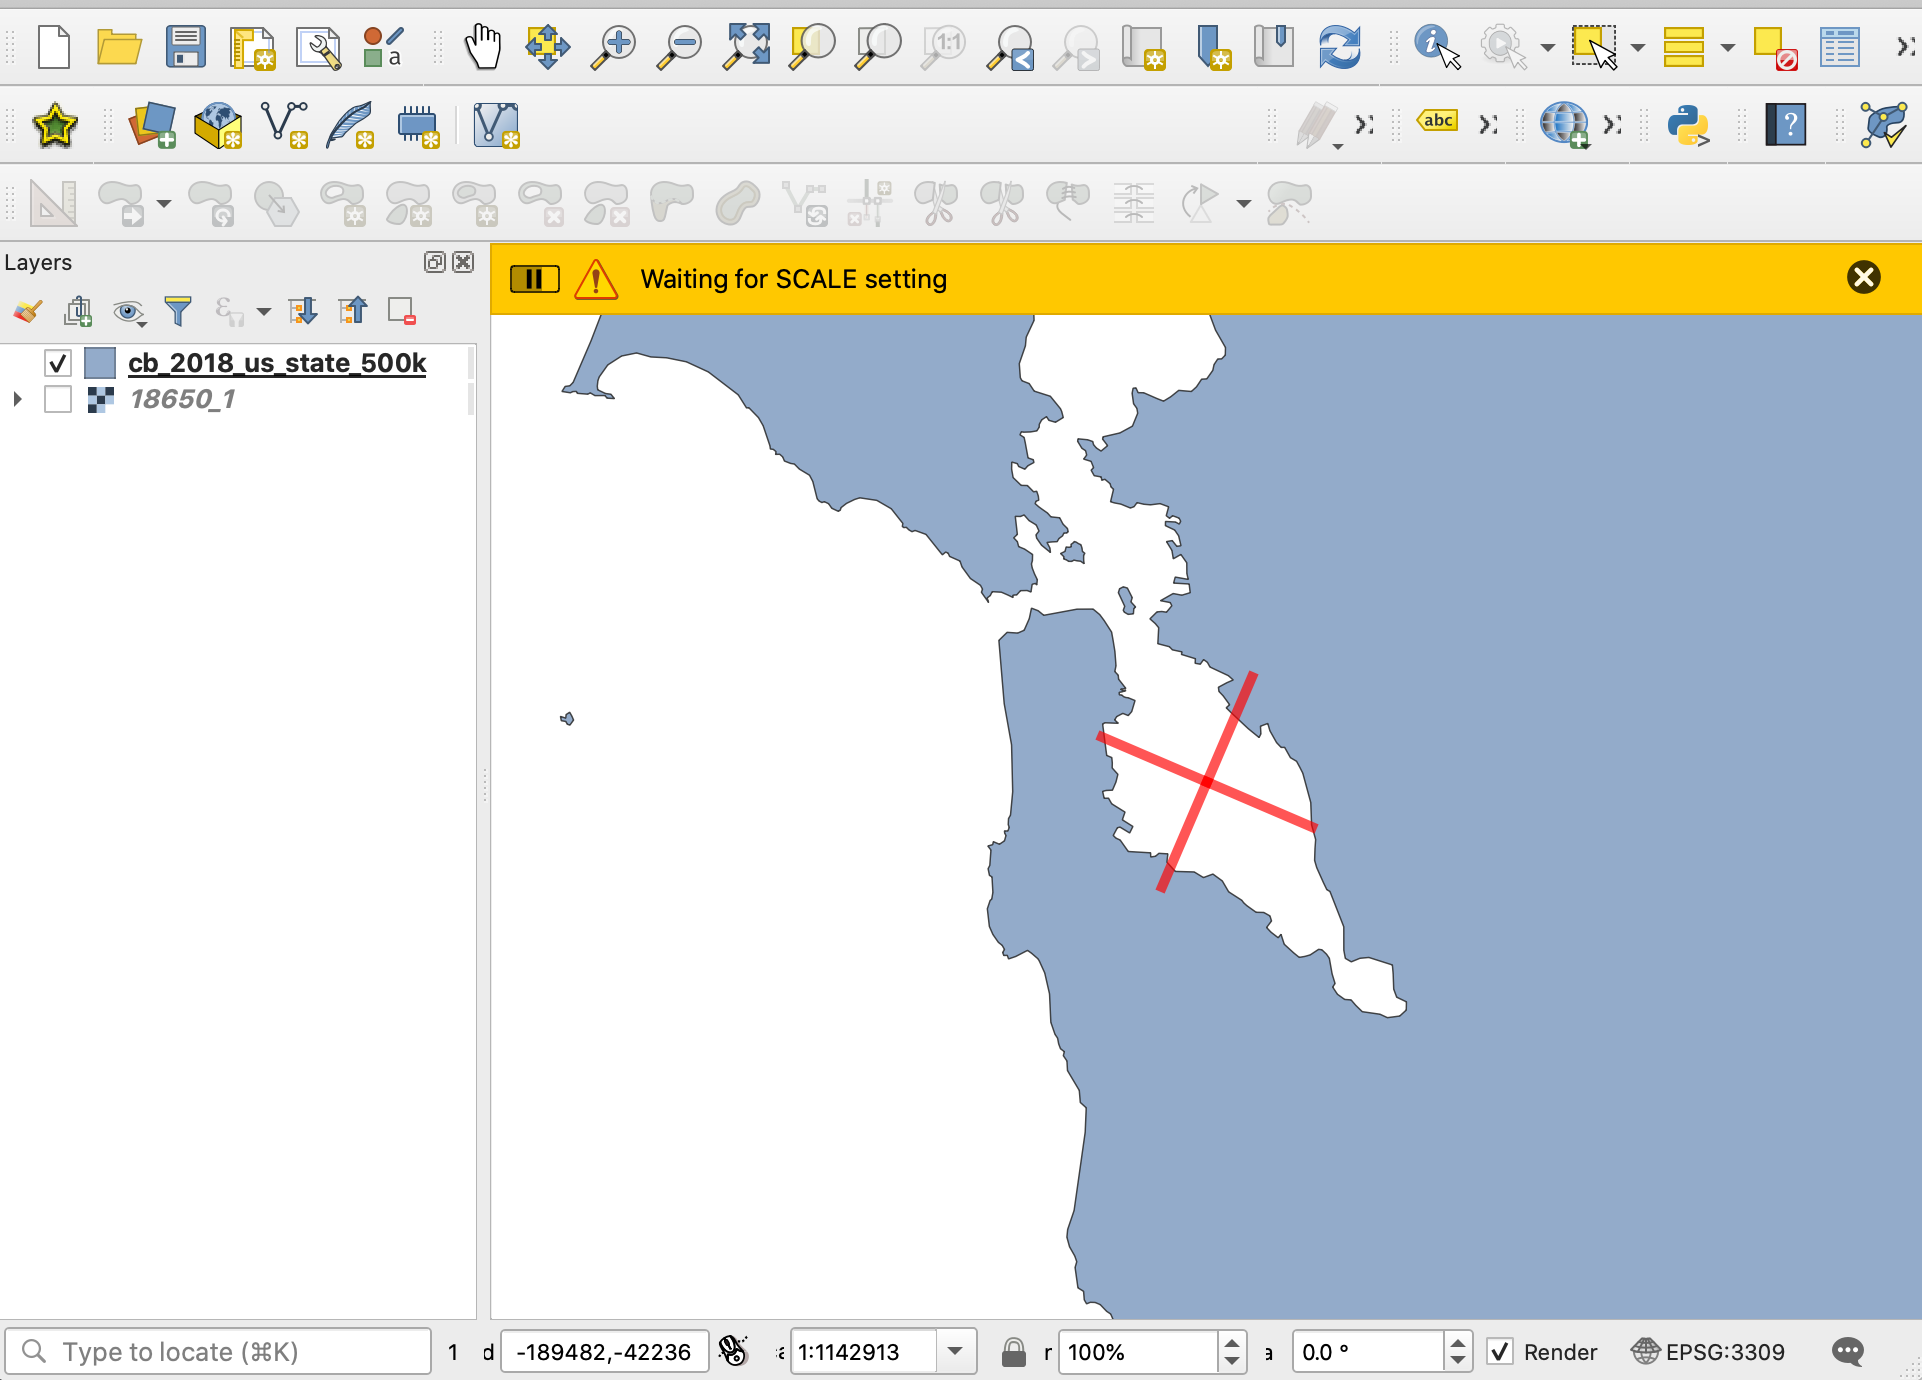
Then move your mouse until the size seems about right. Don't worry about the angle – the cross just shows the center and size of the resulting compass.
Aaaand, voila! You have a compass rose!
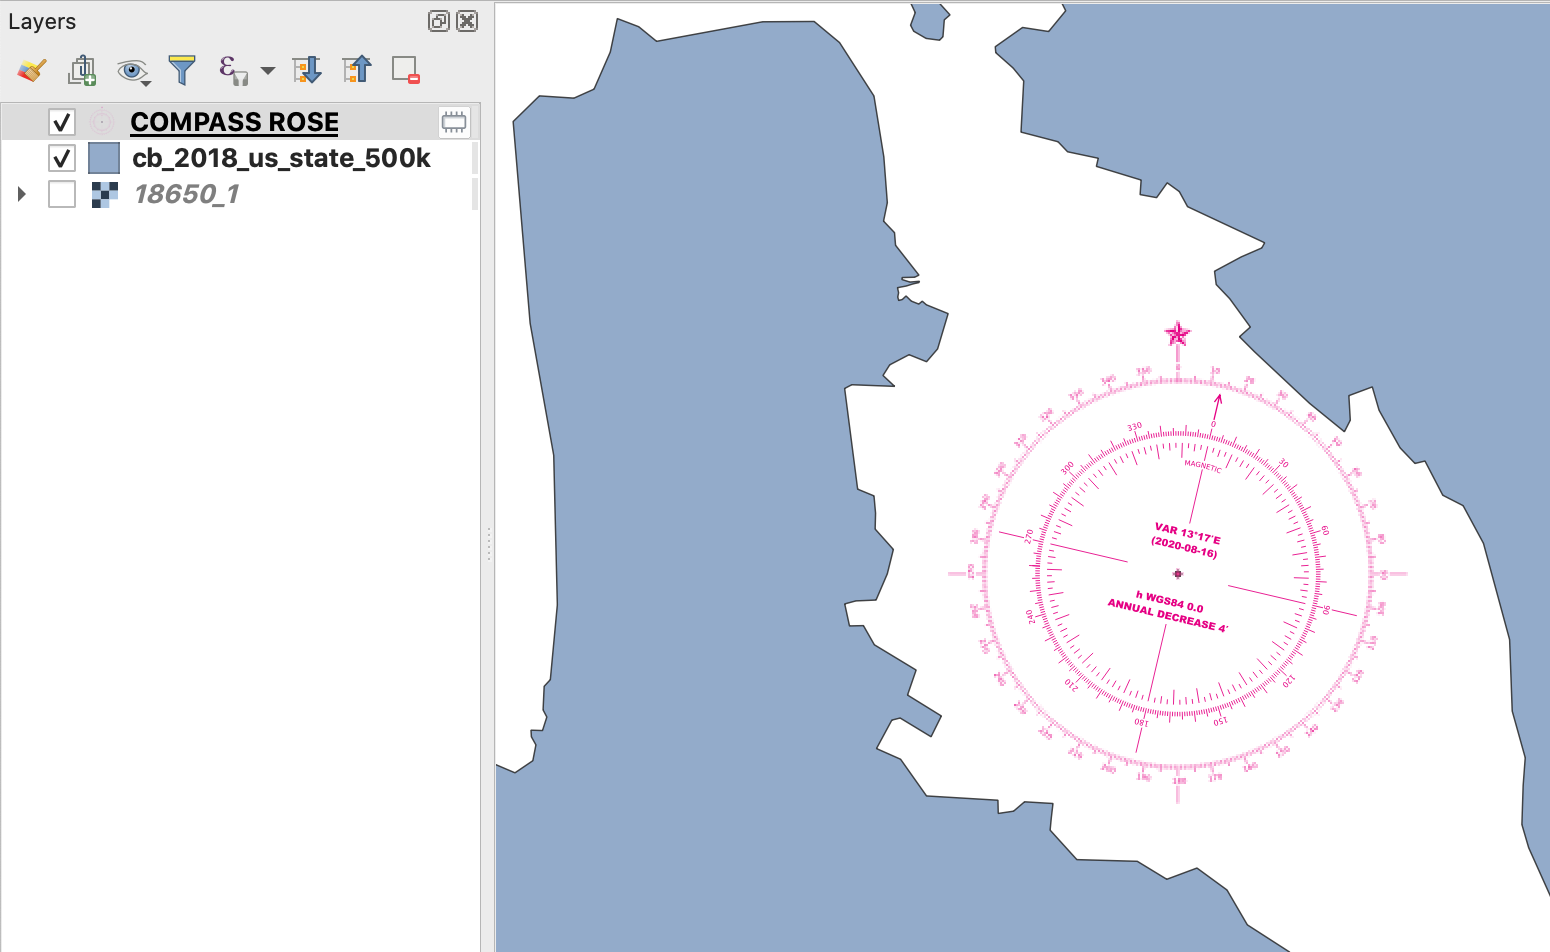
Save the compass
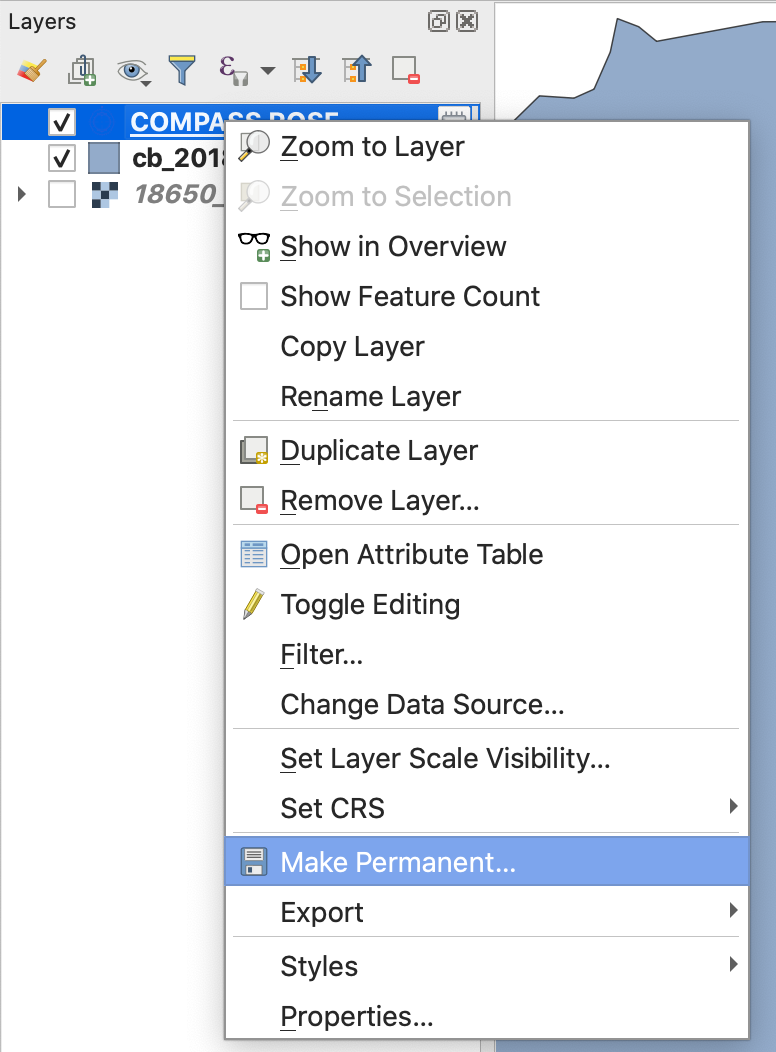
You'll note that the COMPASS_ROSE layer above has a little icon next to it on the right side – that means it's a temporary scratch layer, so if you want the compass to stick around, you'll have to save it. Right click on the layer and click "Make Permanent."
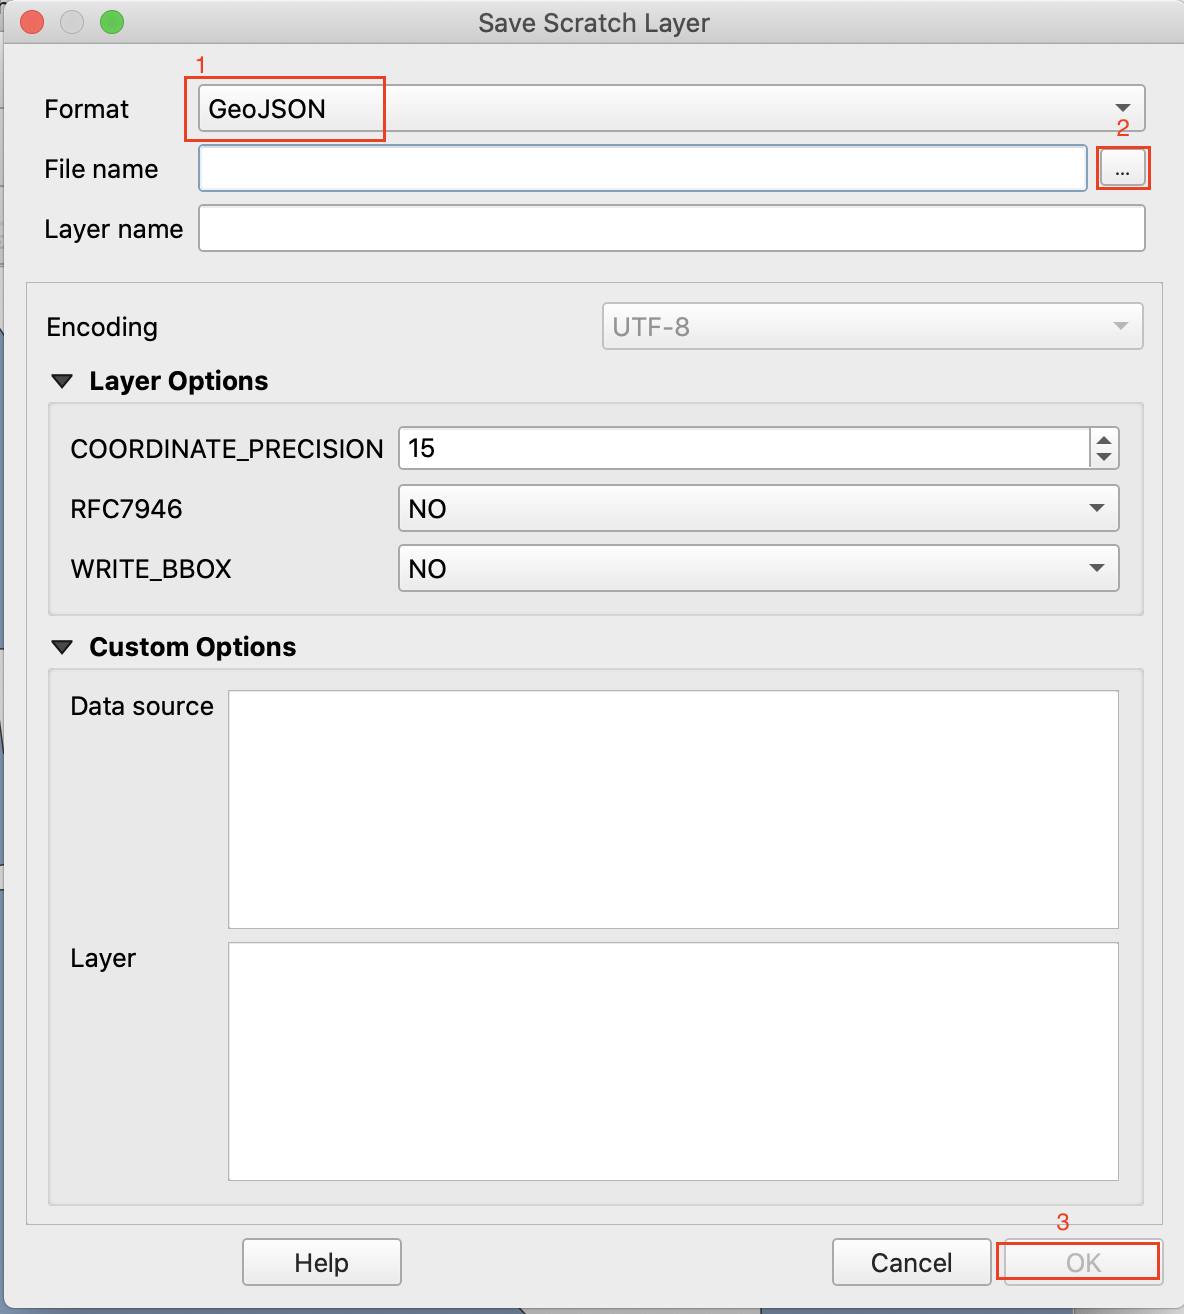
And then choose a format – it doesn't matter too much, so I usually use whatever it has as a default. ALWAYS use the '...' button to choose the file and its name, or it will error (bug, but workable). And then hit OK, and you're done! Congrats.
Lather, rinse, repeat
If you're anything like me, you do this multiple times a day when you're making maps. Enjoy!
NOTE: If you appreciate this plugin (I know I do!) and have the means to do so, please consider donating a few bucks to the creator, which you can do here. Open source software takes time, and if a few donations means the plugin will be maintained, that's a win for everyone.